Background
Project Description: A DIY build of a Prusa 3D printer and enclosure
Context: Personal project (2020)
Technologies: Hand tools, Prusa i3 MK3S 3D printer kit
Project Duration: 3 long days
Challenges
Personal Challenges
This project was incredibly overwhelming at times because I’ve never assembled anything so complex and with so many (literal) moving parts. I chose the kit over the pre-assembled printer not only because it would be more challenging, but I also read that assembling your own 3D printer would go a long way in helping you service/repair it should any issues arise (and they undoubtedly do arise).
Technical Challenges
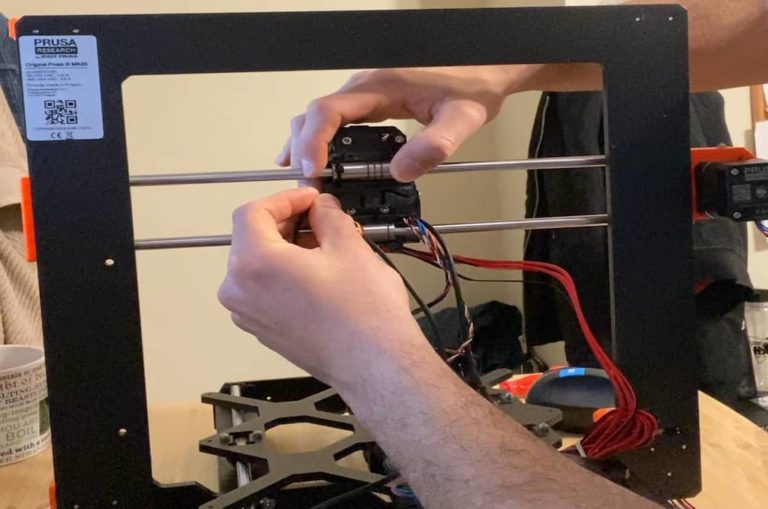
One of the most frustrating challenges involved the careful handling of extremely tiny mechanical parts. Since many of the pieces that come with the kit are 3D-printed themselves, trying to maneuver a small nut into a (sometimes imperfectly) printed small slot/notch was extremely challenging.
What’s worse is that you run the risk of damaging a 3D printed part by over-tightening in frustration. Interestingly, while you certainly can 3D print replacements of damaged parts, this is not possible until the printer itself is completed — the good ol’ chicken-and-the-3D-printed-egg-grandfather-paradox problem.
Ultimately, I employed several techniques that were shared on forums online, such as the screw-pulling technique, that worked wonders provided you took several deep-breaths in between attempts. However, what would have been ideal is to have a little nano homuncli-assembler-person to handle the tiniest of parts:

scalpel. nano-doctor. nano-scalpel.

The biggest technical challenge, however, was parsing out the meaning of instructions at the most critical steps in the build process. Some of the language, while adequately clear and technical, was still incredibly vague: “Make sure the nut is tight, but not too tight. Do not over-tighten or use excessive force!”
Well, how tight is “too tight”? Does “excessive force” presume I am a 7 year-old child or a 200-pound adult? I am guessing the technical writers of the documentation are not intimately familiar with the thornier aspects of the Sorites Paradox.
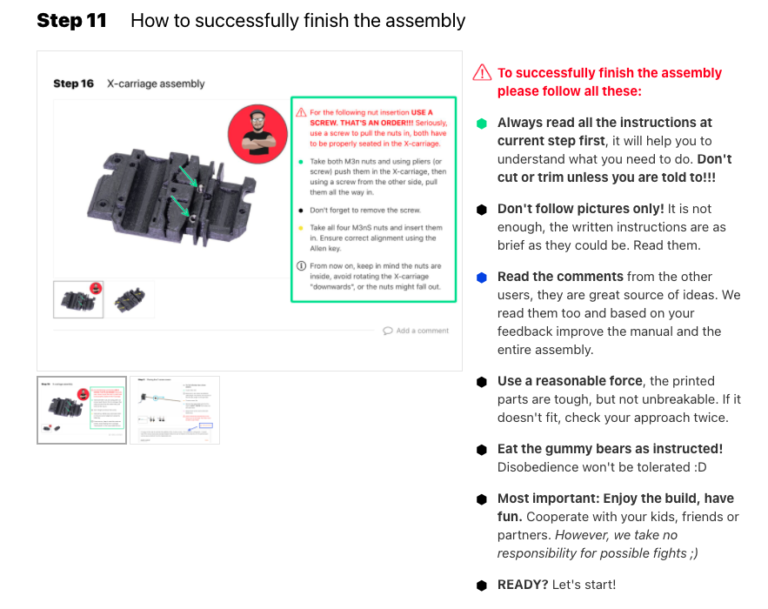
To be fair, however, writing technical documentation for a global audience can be extremely difficult. The company even recommends that successful assembly will require taking advantage of the multiple modes of meaning-making (i.e., words, pictures, videos, comments of others) available on their online knowledge base (see image below).
In fact, the online manual was indispensable in providing real-time comments, suggestions, and tips from the Prusa community — most of whom very recently struggled and prevailed through the build. Unfortunately, some did not prevail; but their comments–more like very unsavory diatribes–while hilarious at times, also served as cautionary tales on what not to do.

Reflection
Personal Reflection
3D printers and the constellation of technologies surrounding them are all incredible. I wish I could travel back in time to ask 20th century industrialists what they think about such technologies. Could they have imagined that one day people could have a tiny factory in their bedroom? That they could “download” blueprints and schematics for free or even quickly prototype their own ideas with incredible ease? Or that with the plethora of new materials that can be used in 3D printing, from metals to biomaterials to food, that perhaps a post-scarce society would be possible?
I don’t really know if that last bit will (or ought to) be possible, but what I do know is that I would rather make my own cup of earl gray tea, raktajino, or black coffee instead of letting a replicator do it for me:

Technical Reflection
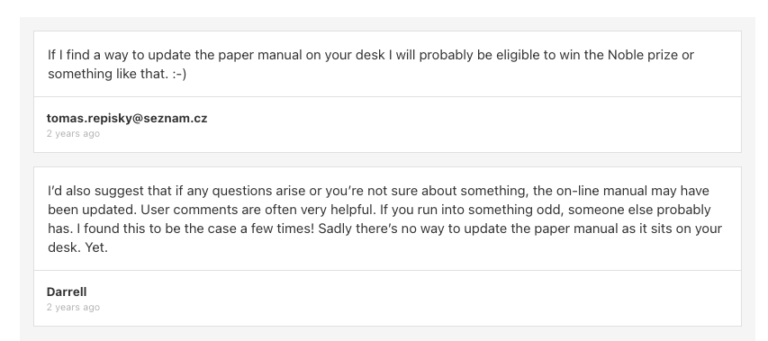
As mentioned above, although the paper manual was surely wanting, I also used the online manual/knowledge base as well as a video of the build to approximate the meaning of some of the trickiest steps. What makes Prusa such a great company is that they seem to be incorporating some of these user-generated comments as feedback by updating their manual accordingly:

This person’s last comment about “updating the paper manual as it sits on your desk” was interesting to me. Throughout the build, I actually wish I had augmented reality glasses that would display just-in-time auditory/visual information throughout the entire process — forget paper. This would have been even more helpful in tackling some of the vaguer instructions: What does “too tight” really look like? How many turns of an allen key is too many? What kind of noises might you hear from a 3D printed part when you are approaching the zone of “over-tightening”?
Of course the best understanding of these words come only with experience and human judgement (I certainly came to understand what “too tight” meant by the end of the process), but for many first-time assemblers some richer and more robust representations would have gone a long way in bridging the gap between an absolute beginner and an experienced expert.
Finally, although it took me almost double the recommended time, I am proud to report I had no issues with the printer on my first test! The biggest lesson here of course is the most basic and fundamental rule of life that all humans have known since the beginning of time: RTFM.
Future Work
One of the great things about a 3D printer is that you can actually print your own modifications and upgrades — meta, I know. Thus far, I have already created an enclosure for the printer using cheap Ikea tables, but I am sure I will make further adjustments when I have time. My next planned upgrade/modification will be web-camera access and control with a raspberry pi (Octoprint).
